
How to Choose a CNC Engraving Machine?
Choosing a cnc engraving machine is less about buying the most powerful model and more about matching its capabilities to the work you actually do. A small sign shop may need a generous bed, reliable repeatability, and simple job setup. A maker engraving brass tags may care more about spindle control, fine detail, and a steady workholding system. The right choice should fit your materials, production volume, workspace, and budget—not just a polished product specification.
Before comparing machines, list the materials and largest workpieces you expect to engrave. Note whether you need rotary engraving, a vacuum table, or an enclosure. These details narrow the options quickly. They also expose a common mistake: choosing a machine for a rare future project while overlooking daily setup time and maintenance. Specs matter. So does service access.
A brief note on attribution: no source articles or verified expert quotation were provided, so I cannot responsibly invent a named specialist’s statement. The guiding principle for this guide is simple: “Choose for the jobs you repeat, then confirm the machine can handle the jobs you may add.” Use the sections below to compare machine type, work area, spindle, software, safety features, support, and total ownership cost. Be practical. Some trade-offs will remain; the aim is to understand them before you buy.
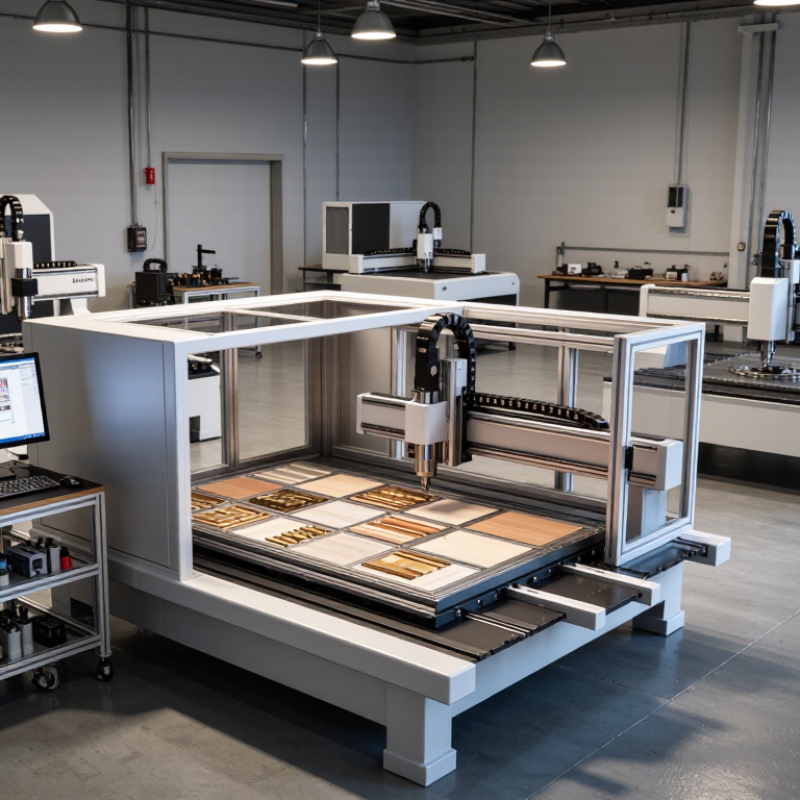
Define Workpiece Size, Material, and Required Tolerance Before Comparing Machines
How to Choose a CNC Engraving Machine?
Define the workpiece size before comparing machine specifications. Measure the material, fixtures, clamps, and tool clearance. A 300 × 200 mm plate may need a 400 × 300 mm working area. Leave room for safe positioning. This is often missed. A machine that barely fits the part can restrict tool paths and create alignment problems.
Material selection changes the machine requirements. Aluminum needs stronger spindle power than acrylic, while hardwood may require better dust control. For steel marking, check spindle rigidity and compatible tooling. The U.S. Bureau of Labor Statistics notes that machinists commonly measure within 0.001 inch, or 0.0254 mm, using precision instruments. That figure is a useful reference, not a promise. Machine resolution is not the same as machining accuracy. Review positioning accuracy, repeatability, backlash, and thermal stability. ISO 230-2:2014 provides methods for testing positioning accuracy and repeatability. Ask for measured test results under realistic conditions. Room temperature matters.
Required tolerance should guide the budget. A ±0.10 mm decorative engraving does not need the same structure as a ±0.01 mm technical part. Material expansion can consume that tolerance quickly. This is where many comparisons become too optimistic. A common mistake is choosing the smallest machine that meets the drawing. Include future workpieces, inspection tools, and clamping space. Then compare spindle speed, axis travel, control software, and service access. Fancy specifications can distract from practical accuracy.
How to Choose a CNC Engraving Machine? — Define Workpiece Size, Material, and Required Tolerance Before Comparing Machines
| Workpiece and Typical Job | Common Material | Indicative Working Area | Typical Detail or Tolerance Target | Machine Features to Compare | Important Checks Before Buying |
|---|---|---|---|---|---|
| Small tags, nameplates, and circuit-board prototypes | Engraving plastic, aluminum, copper-clad board | About 150 × 100 mm to 300 × 200 mm | Fine lettering and shallow features; often around 0.1–0.2 mm, depending on setup | Rigid frame, low spindle runout, small-tool support, repeatable Z-axis | Confirm the usable area after clamps and fixtures are installed; check whether the machine supports the required tool diameter. |
| Signs, panels, and medium-sized decorative parts | Wood, MDF, plastics, aluminum sheet | About 600 × 400 mm to 900 × 600 mm | General engraving and profiling; commonly around 0.1–0.3 mm for appropriately fixtured work | Workholding options, dust collection, adequate spindle power, compatible toolpath software | Measure the largest finished part, not just the artwork. Allow room for clamps, edge clearance, and tool entry. |
| Large signs, cabinet components, and sheet-based production | Plywood, hardwood, plastics, aluminum composite panel | About 1,200 × 900 mm to 1,300 × 2,500 mm | Often around 0.2–0.5 mm for larger-format routing; accuracy varies across the full bed | Bed flatness, gantry rigidity, vacuum or mechanical hold-down, adequate extraction | Ask for accuracy or repeatability specifications across the working area, not only at the center. Check sheet-loading access. |
| Small metal components and instrument panels | Aluminum, brass, copper, mild steel (where machine capability permits) | About 300 × 200 mm to 600 × 400 mm | Often around 0.05–0.2 mm for engraving; tighter results require suitable machine, tooling, and process control | High rigidity, suitable spindle and cutting tools, backlash control, stable workholding | Verify the machine is rated for the specific metal and cutting method. A light-duty router may not be suitable for sustained metal cutting. |
| Rotary engraving on cylindrical parts | Wood, plastic, aluminum, brass | Flat bed varies; rotary capacity is defined by part length and diameter | Depends on circumference, rotary resolution, alignment, and workholding | Rotary-axis compatibility, synchronized motion, tailstock or chuck options | Check maximum workpiece diameter and length, and confirm whether the rotary attachment reduces usable Z clearance. |
| Deep relief carving or thick workpieces | Wood, foam, plastics, machinable composites | Choose by both XY travel and available Z clearance | Detail depends on cutter geometry, material, tool deflection, and machining strategy | Long-travel Z-axis, sufficient gantry clearance, stable spindle, reliable dust management | Compare usable Z travel with the workpiece thickness, fixture height, and tool length combined. |
Note: Dimensions and tolerance figures are general planning ranges, not guaranteed machine specifications. Actual results depend on machine construction, calibration, tooling, material, workholding, cutting conditions, and measurement method. Confirm the manufacturer’s documented specifications and test with a representative workpiece before purchase.
Related Posts
-
China Top 10 CNC Engraving Machine Manufacturers?
-
What Is CNC Engraving and How Does It Work?
-
Top CNC Engraving Machines for Sale Worldwide
-
Top CNC Engraving Machines for Global Buyers
-
What Are the Top Industrial Engraving Machine Types in 2026?
-
What is an Industrial Engraving Machine and How Does it Work?